Adobe Photoshop Learning

Welcome to World Editing Photo

  • RSS
  • Delicious
  • Facebook
  • Twitter

Popular Posts

Magic Bird
Frog New Version
Magic Pigeon

Click Here

Home

Ads

Total Pageviews

Popular Posts

Thumbnail Recent Post

Blog Archive

Followers

Photoshop Manipulation Blog

Photoshop Manipulation Blog is the best blog for you to choose as a guideline to follow how to edit your photo. There are many simple tutorials I create for you and not take a your time to read the steps ...

Organizer

This blog organize by Azli from Penang, Malaysia. I'm try to give a best tutorial with simple step for you to follow it. If you have a problem, about the tutorials or step you can comment directly at my box comment below the tutorial. Hopefully I can help you. Thanks ...

Visitor

Thanks to all because give your time to view my blog. The blog always update by admin everyday. If you want to see a new tutorials, this is the best website for you to see everyday. If you want to share your own idea, you can leave a comment and give your address website ...

Appreciation

Thanks for all visitor especially my beloved friend Miss Jiji who always supported me whatever I doing. Thanks, also to my family and visitor. Click at the promote ads as a point you all supported me, Thanks ...

Issues and Problems

I'm very sorry, if my tutorials or my photos edited make you feel down and cross your sensitivity. I try to improves or change it directly if I think the photos can make a controversy ...

Click Here

Hai..Today I would like to show you a simple tutorial how to make 3D view. Hopefully you enjoy and can practice it.

Final Image

Step 1

Open the pic. I have two pictures. Cheetah and Zebra. You can find from Google Images.


Step 2

Create a new layer. Go to File > New

Step 3

Open the cheetah & zebra pic then, press Ctrl+ A. Copy and Paste at new layer. Like this:

Step 3

Go to Paint Bucket Tool change the layer color to black

Step 4

Add new layer

Step 5

Go to Layer 3 > Rectangular Marquee Tools > and Draw the cheetah pic make frame. After that, at the same layer, go to Paint Bucket Tool and change the foreground to white and click at the cheetah pic.


Step 6

At the same layer go to Rectangular Marquee Tools and draw around to create frame. Like this:

then Go to Edit > Clear

Step 7

Do the same step to make frame for zebra pic. Layer 4: frame for zebra.

Step 8

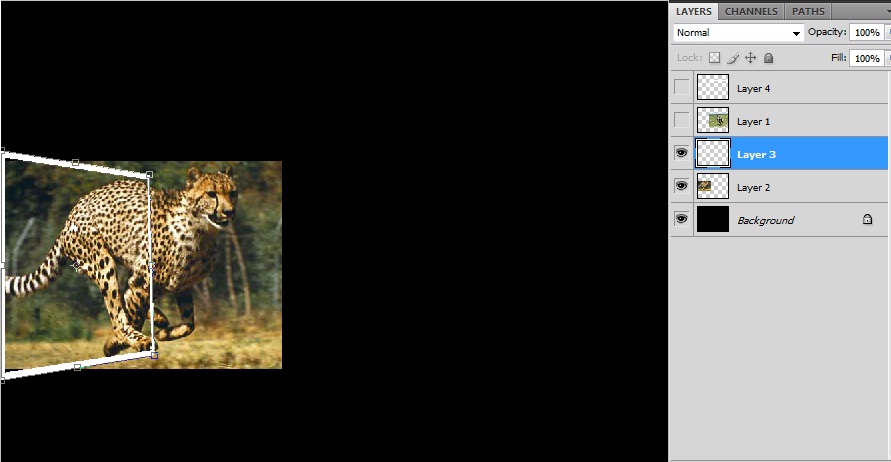
At the layer 3. Go to Edit > Transform > Distort and drag the frame like this:
After that Enter.

then go to Eraser tool to remove area around the cheetah body.

Step 9

Do the same step (Step 8) to zebra layer.

Finish & Good Luck

Leave a Reply