Adobe Photoshop Learning

Welcome to World Editing Photo

  • RSS
  • Delicious
  • Facebook
  • Twitter

Popular Posts

Magic Bird
Frog New Version
Magic Pigeon

Click Here

Home

Ads

Total Pageviews

Popular Posts

Thumbnail Recent Post

Blog Archive

Followers

Photoshop Manipulation Blog

Photoshop Manipulation Blog is the best blog for you to choose as a guideline to follow how to edit your photo. There are many simple tutorials I create for you and not take a your time to read the steps ...

Organizer

This blog organize by Azli from Penang, Malaysia. I'm try to give a best tutorial with simple step for you to follow it. If you have a problem, about the tutorials or step you can comment directly at my box comment below the tutorial. Hopefully I can help you. Thanks ...

Visitor

Thanks to all because give your time to view my blog. The blog always update by admin everyday. If you want to see a new tutorials, this is the best website for you to see everyday. If you want to share your own idea, you can leave a comment and give your address website ...

Appreciation

Thanks for all visitor especially my beloved friend Miss Jiji who always supported me whatever I doing. Thanks, also to my family and visitor. Click at the promote ads as a point you all supported me, Thanks ...

Issues and Problems

I'm very sorry, if my tutorials or my photos edited make you feel down and cross your sensitivity. I try to improves or change it directly if I think the photos can make a controversy ...

Click Here

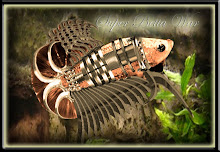
Haii...Today I would like to create Horror Face using Adobe Photoshop
Lets start


Step 1

Firstly open your own pic. And then open the Dry lands texture. Control+A and cut the pic and paste at your image layer...like this:

Step2

Click at your image layer and then go to Pen tool. Just click and focused at your face only.After click around face, click Ctrl+ Enter.. Like this:


Step 3

And go to Image> Adjustment> Desaturate

After click Ctrl+ D for the next step.

Step 4

And then go to Dry Land Texture and resize it. Just click Ctrl+T.. After that change the opacity to 50%.

Step 5

Go to Blend mode. Change to Color Burn

Step 6

At the same layer
Go to eraser tool and remove. Like this:

Step 7

Click at your texture layer...focus at your eye..use eraser tool to remove the the texture...

Step 8

Go to your image click Clone Stamp Tool..Alt+click at white area in your eyes and then click at black area.

Step 9

In an optional step, add another layer above the rest, set the forground color to red and background to black and fill it with the clouds filter filter>render>clouds and then mask it to the shape of the face the same way did the Dried Mud layer, set the blend mode to overlay and opacity to about 50%

One Response so far.

Leave a Reply