Men and women age a little bit differently but since I've only aged female celebrities thus far, I'll just focus on women for this tutorial. I’ll be using the image of Katie Holmes that I did for a past W1K contest, as an example.
Step 1: Choosing an Appropriate Photo
When deciding to age-progress a celebrity’s face, I try to select a picture that is touched-up as little as possible.
I find that candid shots, or any shots that have not been taken in a studio, work best because the resulting harsh lighting reveals more of the skin’s details i.e. slight bags under the eyes and faint wrinkles. The appearance of such details makes it all that much easier to visualize how your subject will age. Visualizing what the end result will look like brings you one step closer to aging her face realistically.
In Katie’s case, we can see very faint horizontal lines on her forehead, fairly obvious lines under her eyes and lines bracketing her mouth.
Step 2: Collecting Reference Material
Reference material is key in my method of aging. Keeping Katie’s face in mind, I scoured the Web, looking for faces of old women who either resemble Katie and/or share the same facial expression. Here, Katie is smiling with her face positioned
at a 3/4 angle so I tried to gather as many pictures of old women who are smiling in the same manner or close to that. I then opened up the picture of Katie in Photoshop and pasted the found images around her face on a separate layer, spread
out to provide easy visual access.
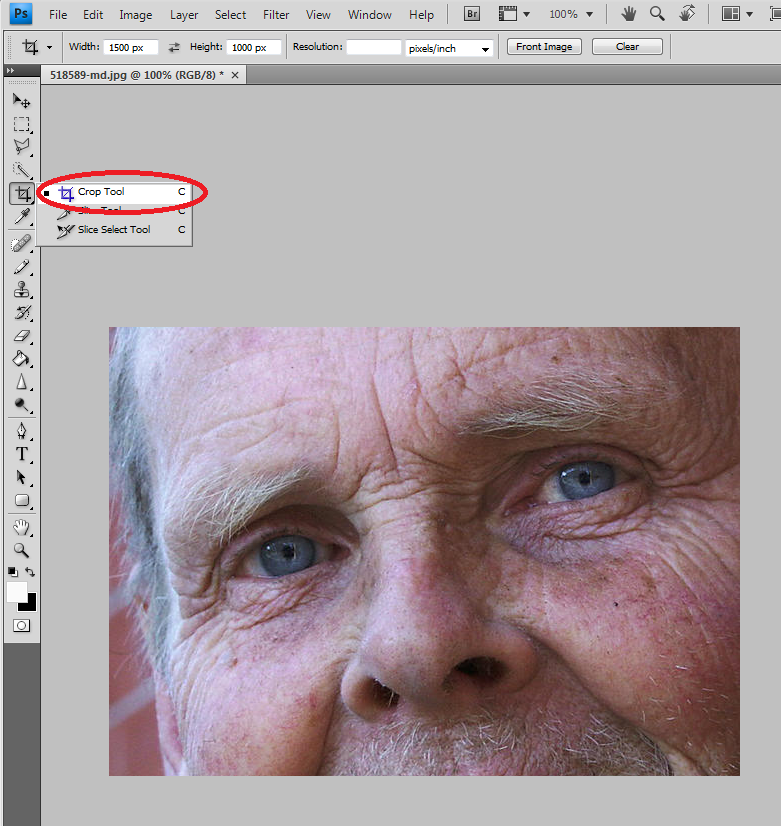
Makna kata ambil contoh rupa orang tua di Google Images yang posing sama dengan gambar kamu. Tidak kisah gambar sesiapa pun. (It means you can find anyone (old man) at Google Images with same posing like you. See example pictures..
Another kind of reference I like to use but is usually hard to find, is pictures of the subject’s parents. I managed to find a couple of reference pictures of Katie’s mother online and they really helped me to decide whether or not to give Katie a
double chin. Since her mom has quite a bit of mass under her chin, I decided I would apply that to Katie too.
Step 3: Thinning Brows
Now the fun begins! The first thing I like to do is to thin out the subject’s eyebrows and eyelashes. The older people get, the thinner their hair gets - either because hair falls out and/or because it dries out as it greys.
So to achieve this, I like to use the Clone Stamp tool at 100% with a relatively small brush size depending on the size and resolution of the image. I sampled the surrounding skin to thin and reduce the number of hairs.
Step 4: Mold the Face
Next, I like to add the basic sags to the skin. I do this in the Liquify mode. I tried to create sagging effects to the cheeks, jowls and the cliff just above the eyes by using the Push tool. For the eyes, I tried to be subtle; otherwise she may end up looking somewhat ghoulish.
From what I’ve learned about the aging process, I know that while bones cease to grow, and in fact shrink, cartilage does continue to grow. As a result, the end of a nose may appear larger as a person grows older. So while I was still in the
Liquify mode, I used the Push tool to extend the length of the nose slightly. Then I used the Bloat tool to also enlarge it slightly, being careful not lose the essential quality or character of the nose. Go too far and it may not look like Katie anymore.
Step 5: The Aforementioned Double Chin
Based on her mother’s pictures, I then added a fairly massive double chin. I initially used the Airbrush tool with some fairly broad strokes, sampling the colors that were already in the area of her neck. I then worked in the details with a finer brush size. Also, keep in mind that I was also using the other reference photos of older women to guide me.
Step 6: Wrinkle Up the Eyes
For me, the most important parts to get right are the eyes. They can make or break the project. Done wrong and the picture may no longer be identifiable as one of Katie Holmes anymore. I sought out the fine lines around the eyes and I tried to imagine how they would progress into wrinkles. I then extended them in length and width accordingly. Referencing the pictures of old women helped a lot with this step.
I used a combination of the Stamp tool and Brush tool. I wish I could explain my technique at this point in a more clinical manner but mostly I relied on my artistic instincts. I emphasized the wrinkles around the eyes by widening and deepening the lines slightly and increasing the contrast by darkening the recesses and lightening the edges. Also, I extended wrinkles to the cheekbone areas. I then applied the same technique to the wrinkles around the mouth and to the forehead.
Step 7: Reducing the Lips
In this step, I work on the lips. As people grow older, the outline of the lips tends to recede. Using the Stamp tool, I sampled the skin surrounding the lips and thinned them out.
While I was at it, I also added a few vertical wrinkles above the lips to give her a bit of a "prune" effect. We just want a hint of that, so don’t carve out deep lines; deep lines would only be necessary if she was puckering her lips.
Step 8: Planning Out More Wrinkles
Here, on a separate layer, I faintly outlined or sketched, with a relatively thin brush size, areas that I may or may not add more lines and wrinkles to. It’s easy to get carried away with the addition of wrinkles. So, I stopped, took a step back and assessed where to take to image. For me, it's essential and a great test to see what best works.
Step 9: Touching Up the Wrinkles
Based on the previous step, I added wrinkles where I thought they were needed most.
Overall, I found that the wrinkles and lines seemed a little flat in comparison to the rest of Katie’s features. They needed more definition so that they could pop out more. So, I highlighted the raised edges of the individual lines with the Brush tool and with a lighter skin tone.
Step 10: Hairy Lips
Facial hair becomes an issue with most women as they age. For some strange reason they lose it in the brow area and grow it back around the mouth area. I didn’t want Katie to be the exception so with a very fine brush size and the Brush tool, I added hairs to her upper lip.
I tried to make it as subtle as possible. Hairs too thick or dark would draw the viewer’s attention straight to her mustache and I didn’t want that. I also added more wrinkles to the area below the corners of her mouth.
Step 11: Refining the Neck
I decided that the neck was too smooth for a woman of 75 years of age. So I added finer wrinkles to that area. Also, I added more mass and weight to her jowls with the airbrush by increasing the value of the tones in those areas thus creating more contrast between surface planes.
Step 12: Adding Age Spots
A key component to effective aging of a face is the addition of age spots.
So at this point, I sampled one of the darker skin tones on her face, and on a separate layer that was set to Multiply and 30% opacity, I brushed them in and tried to create irregular shapes (there IS no perfect age spot). You can add as many as you like; the amount varies from person to person. I decided to be conservative with Katie.
Step 13: More Refinements
I took a little break from it and came back to it later to possibly get a better perspective on it. When I looked at it, at this point, I decided that certain areas needed refining and added detail. This is the beauty of working with a high-resolution file; I can zoom in real close and deal with a wrinkle up-close and personal.
Unless their teeth were subjected to regular whitening, most people’s teeth yellow with age. Gums also recede, showing less gum and more bone. And so with that in mind, I sampled a yellowish-brown color and on a new layer that was set to Multiply and 30% opacity and painted that color to the teeth with the Brush tool. Her gums didn’t show to begin with, so receding the gums here wasn’t necessary.
Step 14: Preparing the Hair
The finishing touch here is greying the hair. I began by creating a mask defining the area of the hair. I used the brush for this and tried my best to define as many loose strands of hair that I could.
With this mask as a selection, I then created a Hue/Saturation adjustment layer and reduced the saturation to –63.
then created a new adjustment layer based on the same mask and adjusted the Brightness/Contrast to brightness +9 and contrast –36. As a result, I found that the darker areas were too pale and caused a loss of depth and so to adjust that, I
then selected the mask and scratched out the darker areas with a 5px brush size at 50% opacity so that they could show through from the original image.
Step 15: Hair Raising
The next step was to raise the hairline and thin out the hair. Hair loss is common with both sexes.
I sampled the area at the top of the forehead and extended the skin area above the original hairline.
Step 16: Greying the Hair
A lot of details of the hair were lost in the previous step so with a thin brush size at 80 percent opacity I drew in fine grey hairs, sparsely laid out.
Patiently, slowly, stroke by stroke I added more and more hairs until I was happy with the amount of grey I had added.
Step 17: Finishing Touches
Finally, I took a step back, refined a few wrinkles here and there ET VOILA!
**Hopefully this tutorial can help you. Depends on your picture..If you want more
easy to edit picture, take your photo and you change your hairstyle like the old
man. Easy for you to adjustment color and your face absolutely like the old
man..Hehehe
My Picture..HEHEHE
Good LUCK..